Lesson 5
Standing Poses and the Three Major Movement Patterns in the Human Body
Part 1: Mammalian Flexion and Extension: Spinal Curves, Growing a Tail
Our explorations of the yoga postures builds upon the foundations of mindfulness, attention to the breath and the balance of weight and lightness as the constants. As humans, we have chosen to stand upright in gravity as our unique postural statement, and 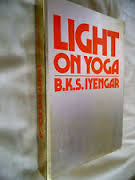 the standing poses, especially as taught by B.K.S. Iyengar, are extraordinary vehicles to unfold the hidden potential of the human body. Iyengar spent many years of fluid vinyasa style asana practice before he established the approach found in his seminal yoga book, ‘Light On Yoga’. He knew you cannot understand the stillness of a dynamic yoga pose if your body cannot move. You will either ‘hold on’, or ‘hang out’. He eventually devised various yoga props to assist students with injuries, illness, or compromised mobility, but for a beginner, simple movements will unlock the secrets of the postures far more quickly than static holding. Once a felt sense of the energy flows of the body are awakened, staying in a pose becomes a meditation, but this is not as easy or obvious as it might seem.
The standing postures can be seen as ways to express some of the most basic movements available to the human body. As we are mammals, we will begin with the basic mammalian movement, forward flexion and backward extension. From dogs, cats and squirrels to porpoises and whales, mammals use the power of this action to move through the world. In hatha yoga we find this in forward bending and back bending
  poses and we see how nature has created the spinal curves to facilitate movement even as we stand. Later, in Lesson 32 on Embryology, we will see how this movement begins just a few weeks after conception as an expression of growth and development.
Mammals use all four limbs in this action, but as we are bipedal, we will start with just the legs. In the next lesson, we will add the arms as limbs in exploring the dog pose and its variations. Beginning with the feet and moving up to the hips, we will focus on feeling the relationship of the bones and joints in moving in and out of the poses. The hip joints are the primary focus as this is where the power is delivered to and through the spinal column, and we will also look at how the spinal curves respond to these movements. In mammalian running, the shoulder and hip girdles are relatively stable and the limbs are free to move. This can be explored in poses like supta padangusthasana.  In our standing poses, the feet are stable and the hips/pelvis moves
The human species are included in the larger category of vertebrates, the creatures with backbones. We have a bony protection for our spinal cord, the vital link between our brain and the rest of the body, and we carry this around 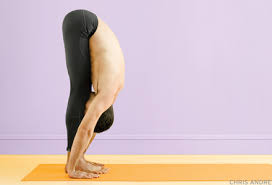 with us wherever we go. Thus the spine plays a huge role in movement. As a matter of fact, when the fish invented vertebrae, they did not need to use limbs for movement. They move their tails from side to side to propel themselves through the water. Our limbs began as fins to help steer and these gradually emerged as limb buds and, when the amphibians crawled out onto shore, fully functional weight bearing limbs.
First, lets get a visual sense of the spine. 
To the left, we see the spine as a whole. We have a head (skull) and tail at the ends, and, in between, 4 distinct regions shaped by curves. Starting from the tail and moving up we first find the subtle curve of the lower sacrum and coccyx scooping slightly forward. The coccyx helps anchor the pelvic floor muscles to help support the whole organ tree. The sacrum connects the spinal column to the legs through the sacro-iliac joints.  Then comes what most people refer to as the lower back, the lumbar spine. These bones are large and strong, but the soft tissues structures are very vulnerable to stress and kinesiologically poor movements and thus the source of much pain and suffering. The lumbar curves inward forming an ‘S’ with the sacrum/coccyx.
Next come the thoracic vertebrae which, because of the extra support the ribs, are relatively stable, but can easily become rigid. These curve outward, mirroring the sacrum. Finally the inward curving cervical or neck vertebrae connect the chest with the skull. These have the most movement possibilities and, because of misuse as in the lumbar region, are often the source of pain and discomfort
Now lets examine the curves more closely. The middle or thoracic curve moves out away from the interior of the body. It is the core of the primary or “C”curve, (it looks just like the letter ‘C’), the shape of the spine in-utero. Inside this very stable curve sits the well protected heart and lungs as well as the kidneys, liver, pancreas and spleen. Above and 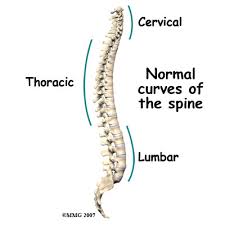 below, in the human upright posture, the lumbar and cervical curves both bend into the body. They are called secondary curves as they are learned in postural development and they provide flexibility to allow powerful movements of the body and elasticity to maintain strength. The cervical curve begins when a baby first starts to look around at the world and learns to move the head. When the toddler begins to stand and walk, the lumbar curve will arise for balance and strength. Feel your own spinal curves. Trace the ‘S’ like shape they create. We will be exploring these in every pose we practice.
When sitting or standing, the secondary curves are sustained as they allow an elasticity to the spinal column. In forward bending poses, these secondary curves are allowed to rejoin the primary curve to create a long ‘C’ curve.  In backbending poses, the secondary curves open as fully as possible, as the primary curve of the thoracic cannot reverse itself the way the secondary curves can.
Skiers Tadasana
Begin in the “skiers tadasana” introduced at the end of the last lesson. Standing with you feet hip distance apart, relax your knees just enough to allow your weight to drop into your feet, and if possible to drop through the floor and down into the earth. Imagine there are living energetic roots extending down from your body, through the bones of your feet, 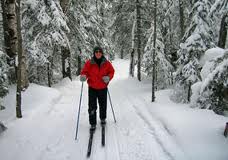 deep into the earth. With your feet well planted, or splatted, as my friend Caryn would say, let the rest of your body relax. You will feel a sense of movement around the ankle bones, as if there were ball bearings (talus bones) and lubrication (synovial fluid) in your ankles. Your feet remain stable while the rest of the body is free to subtly micromove to sustain balance. In the Intermediate course we will look more deeply at the nature of these subtle movements, but for know just feel the sense of stability and relaxation that flows through time. No need to contract or hold on for support or balance. The body self corrects automatically when it is relaxed and feels the contact of the ground. This is the key for a tightrope walker. The extra quality they bring is heightened focus, but balance is fundamentally relaxation and grounding.
Now notice that when you are balanced your knees come slightly forward of center and your hips move slightly backward. The legs are mimicking the spinal curves, the knees being the secondary curve, like the lumbar and cervical, and the hips being the primary curve. Energetically, these links appear all through the postures.
Prasarita Padottanasana and Double Action
Now step your feet quite a bit wider apart and we will explore a variation of tadasana. Keeping the feet planted and the ankles free, let there be slightly more weight on the inner edges of the feet, without collapsing the arches. If you were skiing or ice skating, you would be on your inner edges. This is because of the angle of the legs is now diagonal to the ground and this defines the primary line of energy of movement.
Now find your hip joints, 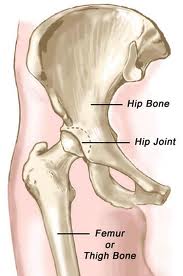 where the thigh bones join the pelvis, and from here recreate the feeling of sitting into your feet and relaxing the whole body, a wide leg tadasana. Notice how this feels different from when the feet were closer together. The wider base usually offers a bit more stability.
Now lets add movement. Begin to move your hips backward, as if you are sticking out your butt or elongating your tail bone, while at the same time slightly bending the knees, keeping the weight dropping down through the feet and into the center of the Earth. As your hips go back you will feel the pelvis starting to tilt  forward. This is the natural action of the hip joints. If you stay relaxed and strong in your feet, the pelvis will turn around the femur heads, the spine will stay relaxed and you can lengthen it forward in the opposite direction of your tail. The hamstrings will offer some resistance, but stay with the feeling of your feet grounding and the pelvis moving freely. Let your arms hang down until they reach the floor. Keep the felt sense of weight in the feet and avoid tightening the knees to stabilize or move the body.
  When you reach the floor, to slowly reverse direction and come back up, again first subtly drop through your feet into the floor to stabilize the whole body. Then extend into your tail and let the weight of your tail come down to bring the torso up. Feel the hip sockets as the fulcrum of movement. Repeat like an effortless pendulum until the movement is easy and the balance remains undisturbed.
Uttanasana
Now bring your feet hip width apart. Relax into the skiiers pose. begin to extend your tail and hips backward and up along an arc, again feeling the pelvis rotating around the femur bone, and release your torso forward and down allowing your hands or finger tips to touch the floor. Going down is easier than coming back. Most beginners will somehow contract the spine to pull themselves up. Because poor posture and body mechanics can lead to disc issues in the lower spine, students are often taught to come up with ‘a straight back’. This is another of the insidious half truths of the yoga world. While it is true that the psoas muscle may inappropriately contract to help bend forward, creating tight erector muscles to counteract the tight psoas just perpetuates the constrictions. The key to coming up safely is to stay in the legs and use the tail to help find the bottom of the sitting bones. The tail swings around, the pelvis comes under, the torso lengthens from the inside and the spine is safe. Bending the knees in the skiers pose, to stay grounding, is the key.
Other forward bending poses
Seated forward bending poses are among the most difficult and will be covered in the intermediate section. Parsvottanasa involves pelvic rotation and will be later in the lesson. Dog Pose will be taken up in depth in Lesson 6.
Remember our first asana mantra “Not the Knees!” All students, especially beginners have to be aware of the unfortunate tendency to use the knees, and the quadriceps muscles, inappropriately. Let the knees be elastic, receptive and supported by the feet. Relaxing the knees is not to be confused with collapsing into the knees. In that case, the feet are not connecting to ground and the weight of the body sinks into the knee joints. We do not want to go there! Feet, ankles, knees and hips work as a single intelligence to help move the body while releasing unnecessary tension in the spinal column.
Part 2: Lateral Flexion and Extension, or the Fish Body
Starting in skiers tadasana, find the balance of weight and lightness as a current of energy flowing through you. Relax into ground and feel/sense/see the space around you. Feel alive and present. In the previous lesson, we examined the act of bending forward and coming back up right and discoverd that if the legs stay engaged and alive, the pelvis moves though space and the body feel safe as it moves up and down. No unnecessary tension arises and the movements are effortless. Now we will explore a different pelvic action: lateral flexion and extension.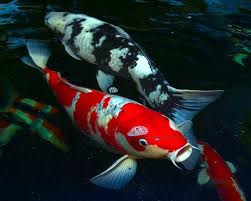
Mammals primary movements come from what is known as sagital flexion and extension, or what in yoga is called forward and backward bending. Our ancestors, the reptiles, amphibians and fish use a different action. They move sideways, or what we will call lateral flexion and extension or the fish body move. The primary pose here is trikonasana, the triangle pose. Out of this basic action we will explore three related poses, side angle, warrior II, half moon and tree pose.
Trikonasana
As previously noted, all the structures of the feet are involved in providing a stable base. Here we begin with a wide stance, 3- 4 ft apart, or about the length of your legs, so you create a triangle with the two feet and the base of the spine as the three corners. Because side bending of the spine is much more natural than in the pelvis, the yogis adapted the triangle by turning one foot 90 degrees out (the front foot) and one 60 degrees in (the back foot). See photo.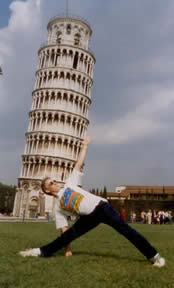
Now imagine your tail is long like a fish, extending to the floor between your legs. Keeping your legs relatively straight, as best you can swing the tip of your tail toward and beyond the back leg and let the pelvis follow along an arc, when you get to the end of the movement, pause and return back to the beginning, like the swinging of a pendulum. Repeat again several times and then change sides. Be careful of the front knee. Do not try to ‘square the hips’!! You will damage your sacro-illiacs sooner or later. Liberate your fish tail instead. Remember, move slowly and mindfully in and out of the pose several times on each side. No need to get your hand to the floor. Go only as far as the pendulum action allows. Try micro adjustments to the angles of the feet and pelvis to find more space and ease. As you become more accurate, the hip/groin muscles will begin to melt
Parsvakonasana and Virabhadrasana II
The next posture is a continuation of the trikonasana action with an additional piece. As you swing the tail and let the pelvis follow, allow the front knee to bend, moving on a straight line toward the front foot. The tarsals and metatarsals of the front foot ground the energy firmly into the floor and forward, lengthening the mat, with almost no weight on the 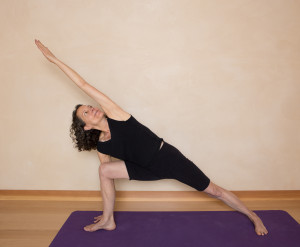 heel. This will protect the knee. Also, the front knee should never extend beyond the ankle and should not wobble or veer inward. This is the fork in the road between two more challenging postures, the side angle pose and warrior II.
 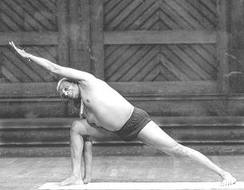 Beginners can pause here and then reverse, moving as smoothly and slowly as possible in and out of the pose. Repeat the action several times and then change sides. This brings us back to our first asana mantra which is “Not the Knees!” As mentioned before we all have an unfortunate tendency to use the knees inappropriately. Let the knees be receptive and supported by the feet.
More experienced students can explore the side angle pose by deepening the circular action of the groin so that the whole torso drops onto the front thigh. The arms can extend as seen, you can use a block if the groins do not allow the full movement, or explore other possibilities, such as imagining picking up a sock from the floor with your hand, and then placing it back down again.
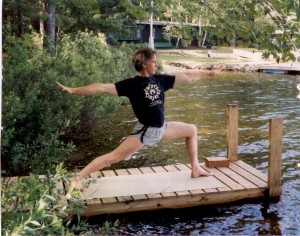 In Virabhadrasana II we find the third pose in this grouping of fish body postures. It begins with the trikonasana action of extending into the back leg and the parsvakonasana action of simultaneously extending the front groin. Then, instead of going deeper into parsvakonasana by lengthening the groin even further, we
 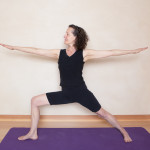 circle up and out from the groins through the arms, like a fencer or an archer. Again, to learn the healthy action, do not stay in the pose but slowly, gracefully, effortlessly move in and out of the pose. Notice the break of energy along the deep front line of the right side between the groin and torso in the student on the dock. the black lines on his shorts point directly at this.
Ardha Chandrasana Coming into the half moon pose or ardha chandrasana involves a continuation of the actions of trikonasana and parsvakonasana. 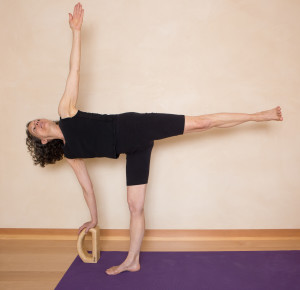 The primary fulcrum or hinge is the front leg hip joint. The supporting energy flow comes from the standing foot. Then we find the see saw action where the action of the back leg extending balances the torso.
From triangle, release the front knee forward like parsvakonasna, extend the front hand out while simultaneously lengthening out through the back leg. A simple pivot brings you into the pose. Practice coming in and out, staying low to the ground, in the beginning. Find the balance and fluidity. In figure skating, this is called a forward spiral, here down by Tara Lipinsky. We will use ardha chandrasana as the starting pose for our exploration of twisting poses in the next lesson.
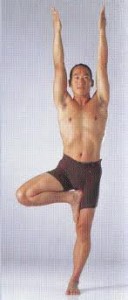
Tree pose is another fish body pose. (Thanks to Rodney for an elegant demonstration.) Because the front or bent leg is turned out as in the previous poses, the bent leg foot can provide leverage to open the pelvis sideways. To find balance the weight has to shift slightly to the left and this can open the left groin. Notice the nice long line of energy from his inner left foot to the inner left palm. Tree pose can be used to learn the deeper action in trikonasana because the leverage in triangle is where the foot presses the thigh in tree.
Part 3: Human Movement: Spirals, Rotations and Twisting
 We’ve been mammals in part 1, and fish and reptiles in part 2. Now its time to become more fully human. The third movement of the pelvic bone around the femurs is rotation, or twisting. Also called spinning or spiraling, rotational movements are stabilizing when oriented around an axis, like the gyroscope to the left. On a cosmic level, the Milky Way, our home galaxy, spirals through space. The solar system spirals around the sun and the moon spirals around the earth. By aligning ourselves with these cosmic forces in our twists, we can begin to sense what Patanjali describes in his second sutra on asana, ‘prayatna shaithilyaananta samapattibhyam’; with the relaxing of effort, and aligning with and dissolving into the the cosmic spirals,(asana is mastered).
 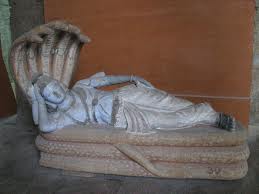 Ananta is the coiled snake that serves as Vishnu, the sustainer of the universe’s couch. Vishnu is very relaxed as he keeps the cosmos running because the coiling snake, the spirally energy of the feminine, takes care of it all.
Begin with the mammal and fish poses to warm up and then, from ardha chandrasan we can begin rotating. In our twisting poses, the spine, or chakra line, energetically, is the axis and the pelvis the rotating entity. We can look at the pelvis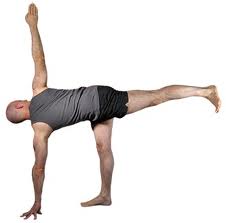 from two perspectives. For most people, perceptually and kinesthetically, there is only one pelvis, but two femurs. We will begin our enquiry by recognizing that we can also feel the pelvis as having two components, right and left, that can move independently. We began that in ardha chandrasana and now we will use revolved ardha chandrasana to begin the twistings. Here the upright leg/pelvis extends dynamically, creating a lightness to help open the tight deep muscles of the weight bearing leg. This will be felt more when the student moves back and forth from ardha chandrasana to revolved ardha chandrasana.
 It is the moving back and forth between the two poses that is crucial. We can create the same action in one legged dog when we rotate the torso around the standing leg. This will challenge the weight bearing hip to both stabilize the support the body and mobilize to allow the action.
It is important to note that moving back and forth between the poses, or continuously in and out of them is where the opening and learning take place. Sustained flow of energy is crucial. Otherwise there will be holding, contacting or collapsing around the joint. This hip rotating movement of the half moon pose is frequently seen in athletics, as seen here with Venus Williams and Rafa Nadal in tennis, and Roger Clemens in baseball.
Ballet has their own variation known as an ‘arabesque’. Being ‘on point’ really activates the deep front line so the dancer is both delicately balanced, but also powerful.The figure skater’s arabesque is known as a spiral.
The rotation of the pelvis around the femurs is also used to deliver power to the torso and upper limbs as also seen in hitting golf balls or baseballs, and throwing.
We will now look at the standing twists that keep both feet on the floor. This is more challenging that having a free leg as now both hip joints are required to rotate and each can restrict the other. The beginning of parsvottanasna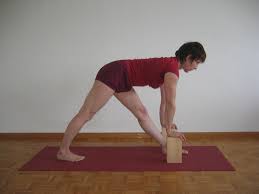 is actually the first standing twist as when one leg is forward and one back, the pelvis gets confused. Which leg should it follow? To bring it to align with the front leg requires the same action that happens in the revolved half moon. Because the back foot is planted, one must be careful to protect the knee, as the knee will try to torque if the hip decides not to rotate. In this beginning demonstration, the student is using blocks to stabilize the upper body and zero in on the
 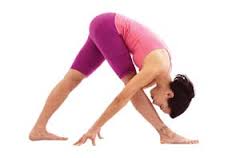 hip rotation. To add the forward bend, keep the pelvis from twisting as the hamstrings and inner thighs lengthen. The front leg is deeply challenged at all levels, making this a useful pose. To make it even more interesting, add the
 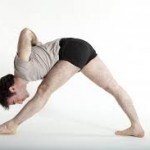 namaste hands to open the front chest more deeply. Just do not collapse the front line to do so. (Thanks to David Melloni, Simon Park and Dominique Fornara-Zuni for their presentations.)
Revolved triangle requires an even more challenging action as now the rotation goes further than parsvotanasana while staying in the forward bend. In this more beginning variation, the forward bend has been eliminated and a wall helps in alignment and energy flow. This is closer to revolved half moon pose.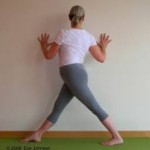 In the advanced pose with Kate, we add the full forward
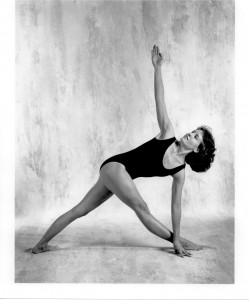 bend. If the hip flexibility allows, cross the hand to the outside of the front foot, otherwise, keep it on the inside, Feel free to use a block for support if the hamstrings or other hip muscles do not let you get your hand to the floor.
Our last standing twist, revolved parsvakonasana, with the front leg bending is the most challenging standing forward bend, especially if you try to keep the back foot on the floor. Even Iyengar’s back foot is 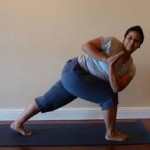 challenged. Modern variations allow the back foot to pivot and add different variations for the arms. These poses are asking the spinal column, ribs and shoulders to more dynamically participate in the action than revolved half moon. Forceful action can lead to compromises and confusion in the tissues. We will address what is required in these deeper spinal actions in a later section.
Please please please remember that the outer form of the pose, that is, how far your musculo-skeletal flexibility takes you, is only the beginning of the yoga. The point is not to look like Iyengar, or force your body into an extreme position, but to challenge you to feel more deeply the breath, the fluidity, the emotional and psychological undercurrents to your actions. Then the postures bring an inner calm, even when strenuous and challenging.


