Lesson 10:
Using Props in Asana Practice
Leverage
Having explored the fundamental movement patterns that underlie the asanas, and seen some of the ways to use props for support in restorative poses, we can now look at how props can utilize one of the basic principles of physics, leverage. There are many ways we use yoga postures to enhance perception and sensitivity to energy, and using props to highlight keys places of leverage and balance is one of B.K. S. Iyengar’s greatest gifts to the modern yogi. The Iyengar system has spawned an amazing number of ways to use props to improve leverage, awaken a deeper sense of space in the poses, and open and integrate the chakra energies. We will explore a few possibilities.
Because of the long bones of the limbs and the action of the joints, the human body is an amazing place to explore leverage and the role of fulcrums in creating a sense of balance 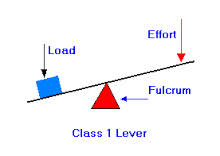 and ease, of sthira and sukham. This class of leverage is the see-saw action we use in opening
  the hip joints. When we grow a tail, and use the inner back heel as a continuation of tail energy, the center of the front leg hip socket is the fulcrum around which the pelvis can rotate
 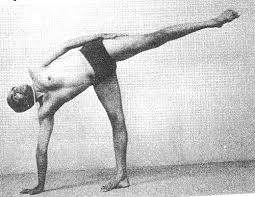 freely, and also a center around which the body can find the stillness of perfect balance. The leverage of the back leg/tail counter-balancing the torso is most clearly seen in half moon pose, especially when you compare Iyengar to the class 1 level picture. The same principle applies to trikonasana and the other standing poses.
The use of belts allow us to further enhance the connection of the back leg/tail and front hip joint in the main hip opening postures such as parvsvottanasana, here demonstrated by Iyengar teacher Roni Brissette, 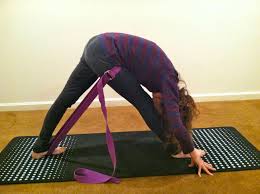 and supta padangusthasana. Note the second belt in supta padangusthasana from the upper hip to the lower foot. A more precise placement of the belt would have it around the metatarsal bones, especially the big toe of that lower leg. That gives you the ability to adjust inner and outer rotations.
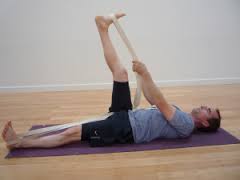 Most beginners use only the upper leg belt and never quite get into the hip joint. The same action can be taken into ardha chandrasana and revolved ardha chandrasana.
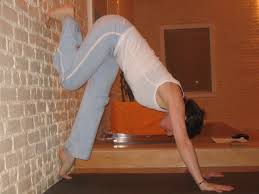
Another old favorite, done with belts or wall ropes is the hanging dog pose. 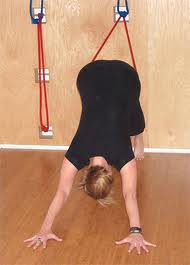 Here the rope loop acts as an accessory tail, teaching the muladhara to trifurcate, giving a strong traction to the hip sockets and tops of the thigh bones. When the hips are open,
 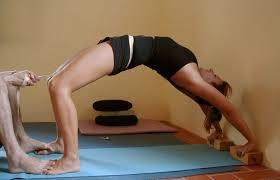 the leverage releases the spinal column. Speaking of belts and tails, here is a great photo from Lauren Cahn in the upside down downward dog, or urdhva dhanurasana. Notice the action and direction of the pull of the belt. The tail lengthens out dynamically. The tendency is to confuse the tail and the hips and overly contract the muladhara. The use of blocks takes some of the effort from the shoulders.
Once the hips and tail are awake and the energy is flowing freely, (1st chakra) we can look to opening the sacroilliac joints, a key, but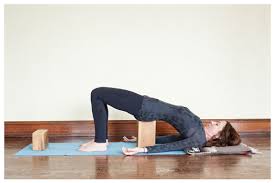 challenging action. Here we switch to a wooden block, or brick as they say in Pune. Iyengar instructor Holly Walck is demonstrating the use of a block in bridge pose to open the core. The release the sacrum the fulcrum shifts from the hip joints to the sacro-illiacs. The feet stay engaged, the pelvis is anchored to the block, and the tail can adjust up or down to find the happy spot for the sacrum. In this photo, the student needs to release the throat as the fifth chakra is compressing. More height under the shoulders and a slight rotation of the skull will align 5th and sixth chakras with the sacral area or the 2nd chakra.
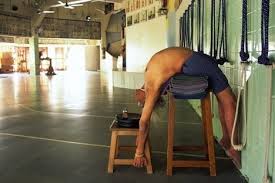
For those looking for a deeper experience, check this out. Here Iyengar is using a stool with blankets to open his sacral-lumbar region and the heart, the wall to activate his feel and muladhara, and another stool to anchor his hands (notice the length through his wrists, elbows and armpits.) He has been exploring these deep supported backbends for years, as this is his (and the human’s) edge.
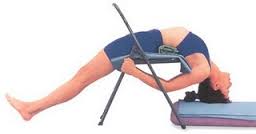 Leveraging the different vertebrae of the spinal column can also be done with chairs. These poses are quite intense and care must be taken not to hang out or hold on, but to use the chair to direct perception and place the fulcrum at the exact place along the spine where you can find balance. Iyengar teacher, Kisa Davison, at left in viparita dandasana, is demonstrating the classical Iyengar chair backbend. Her head is supported, legs dynamic, but there is some compression at T-12 as seen by the sharp angle between the bottom of the ribs and the abdomen. The seat of the chair (the fulcrum) would be better located either lower or higher on the spine, as T-12 is very vulnerable to this hinging. If you work organically, rotating the liver would also help ease the transition between 3rd and 4th chakras.
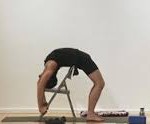
Here the back of the chair is used by Noah Maze to open the 3rd chakra region. Note the hands and compare the length of the armpits to those of Mr. Iyengar, just to get used to seeing energy patterns. 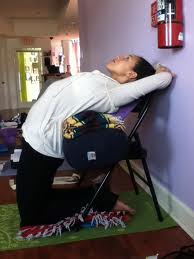 Priscilla Polonia is using the chair and a bolster in supported camel pose (ustrasana). Feet stay active, pressing down, tail energy keeps lengthening, and the head is supported by the back of the chair. Adjust the placement and size of the bolster to fit the needs of your body.
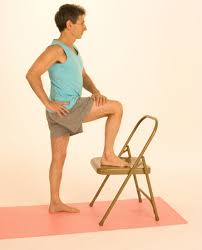
Chairs can be utilized in standing poses to alter the leverage in the hips, such as this parsvakonasana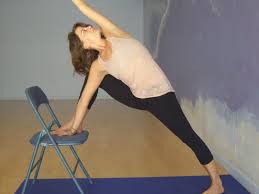 by Kimberly Drye. If she were to be a bit closer to the wall, she could use it to press the edge of her foot away from the chair to deepen the action in the back leg groin. Here is another variation, from a wonderful standing pose series on sciata.org.
  B.K.S. Iyengar, the pioneer in yoga props uses a trestle, his own all purpose yoga toy, in trikonasana.
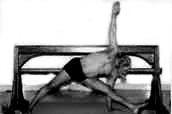 It is hard to see, but he has a half round block under his front foot, and both feet are wedged up against the sides of the trestle so he can press out without the fear of ending up in a split. I personally learned the depths of trikonasana working this way with the trestle we had in San Francisco.
 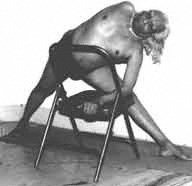 Mr. Iyengar’s forearm gives him more dynamic action through his shoulders and chest in this variation with a chair.
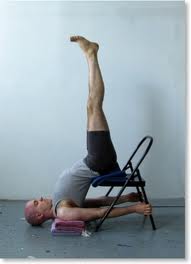 Finally, Iyengar’s chair sarvangasana, here demonstrated by Iyengar teacher Witold Fitz-Simon, uses the chair along with blankets (or a bolster) for the shoulders, and padding for the sacrum. The arms extend through to the back legs to stabilize and help adjust the shoulders so that they roll under and in towards the spine to create lift. The arms can also be outside if the shoulders are lacking in flexibility. A bolster can also be placed on the seat of the chair and the legs can then extend back into its support.
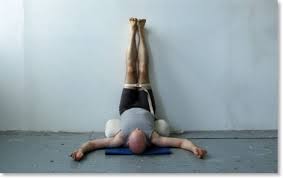
A simpler pose for beginners, and everybody, is viparita karani, one of the main restorative postures. Witold has the bolster near the wall so the legs are supported and a belt contains the leg energy.
Props for Support
Belts are used to help focus the energy and allow relaxation as in viparita karani shown 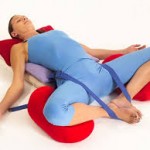 above. In supta baddha konasana, the belt stabilizes the legs and pelvis together.
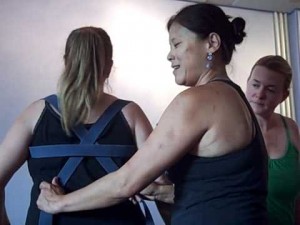 To the right we see yoga teacher Cora Wen demonstrating the use of a long belt to adjust the shoulder girdle and open the front of the chest. To get here, hold the belt across your bottom shoulder blades and bring the ends under the armpits to the front. Then lift them up over the collar bones and cross them as they come behind the neck. Hold with hands and pull down.
Walls: Walls are great for both beginning and advanced level practice, if there is enough room. 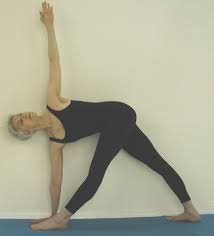 On the left, the wall helps provide alignment information as well as support in revolved triangle. Below, the wall becomes a support to begin exploring the handstand.